 |
kbLogger 2.0.b1
The automotive ready test and logging program.
|
 |
kbLogger 2.0.b1
The automotive ready test and logging program.
|
Description:
The OptolyzerObject is used as a interface to the Optolyzer by K2L. This is the same Optolyzer which was sold by Microchip and SMSC in the past. The support for the older Optolyzers (red and brown) is dropped.
The OptolyzerObject is a ConfigItem which uses a standard ComObject to communicate with the device and translates the device specific API into an kbScript compatible class ConfigItemOptolyzer.
Creating a OptolyzerObject:
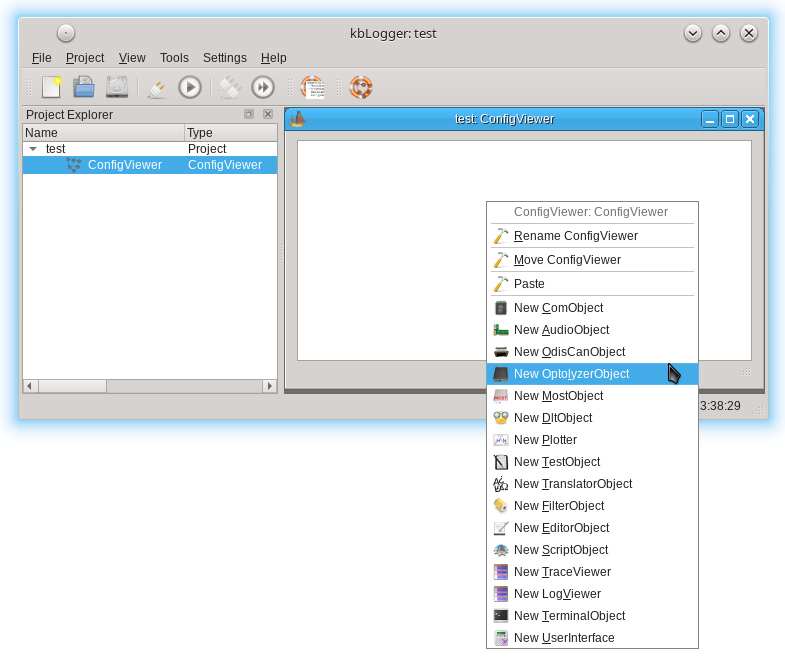
Do a right-click on an empty place in the ConfigViewer of your project and choose "New OptolyzerObject".
Configure the OptolyzerObject:
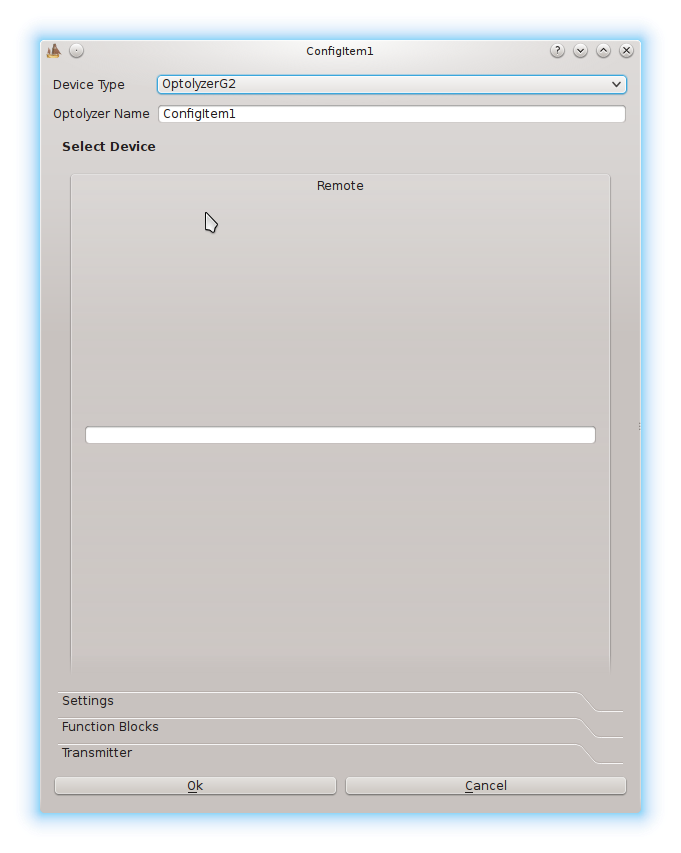
Double click on the ScriptObject to open the configure dialog.
Device Type:
In this ComboBox, you can choose the type of the Optolyzer. Only the Optolyzer G2 (MOST150, 50, 25) is supported yet. In later versions of kbLogger, you may able to choose also the Optolyzer V1 (brown) and V2 (red) (both MOST25).
Optolyzer Name:
The edit field "Optolyzer Name" contains at first a generic name like "ConfigItem1". This user changeable name is used to identify the ConfigItem in the TraceViewer or LogViewer. This name can also be used as sender or receiver name for massages.
Select Device:
In this EditField, you have to write the IP address or the Ethernet name of the Optolyzer to connect to. Since used TCP/IP port of the Optolyzer is fixed by the used application of the Optolyzer (Node or Spy), it is not necessary to write it here. The kbLogger will choose the correct one.
Settings Mode:
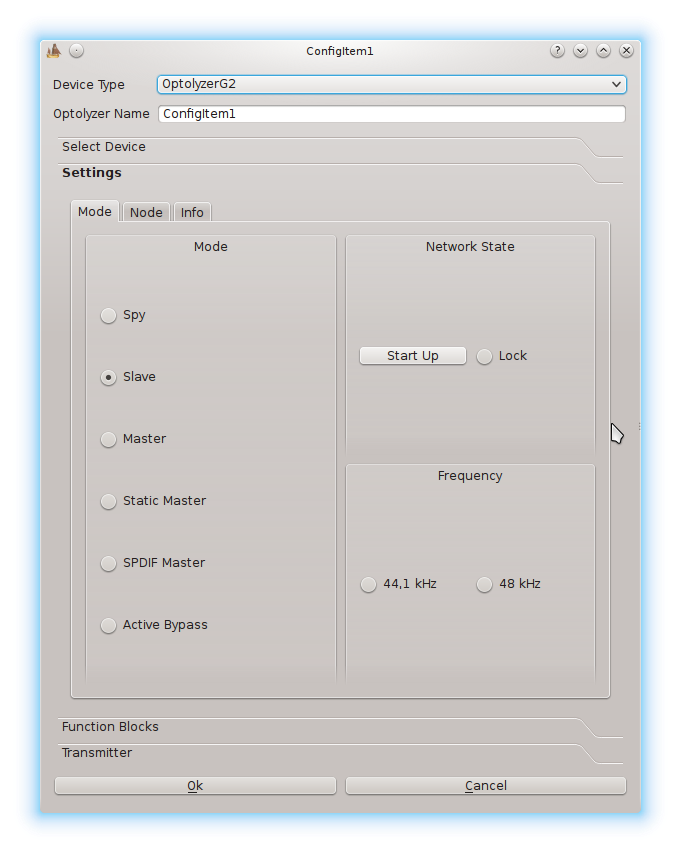
Do a left-click on the Settings-Tab and then on the "Mode" Sub-Tab.
Mode Spy:
In this mode, the OptolyzerObject communicates only through the spy protocol. You are only able to receive Spy messages. You cannot communicate with the NodeNIC or the StressNIC. To do that simultaneously, you have to use a second OptolyzerObject in Master or Slave mode.
Mode Slave, Master, Static Master, SPDIF Master and Active Bypass:
In this mode, the OptolyzerObject communicates only through the node protocol. You are only able to receive node messages. You can communicate with the NodeNIC or control the Optolyzer at all. To receive Spy messages simultaneously, you have to use a second OptolyzerObject in Spy mode.
Network State:
By clicking on the push button "Start Up" you can start or stop the MOST network. The LockState is shown in the radio button "Lock".
Frequency:
The radio buttons "44,1 kHz" and "48 kHz" are set accordingly to the MOST frame rate.
Settings Node:
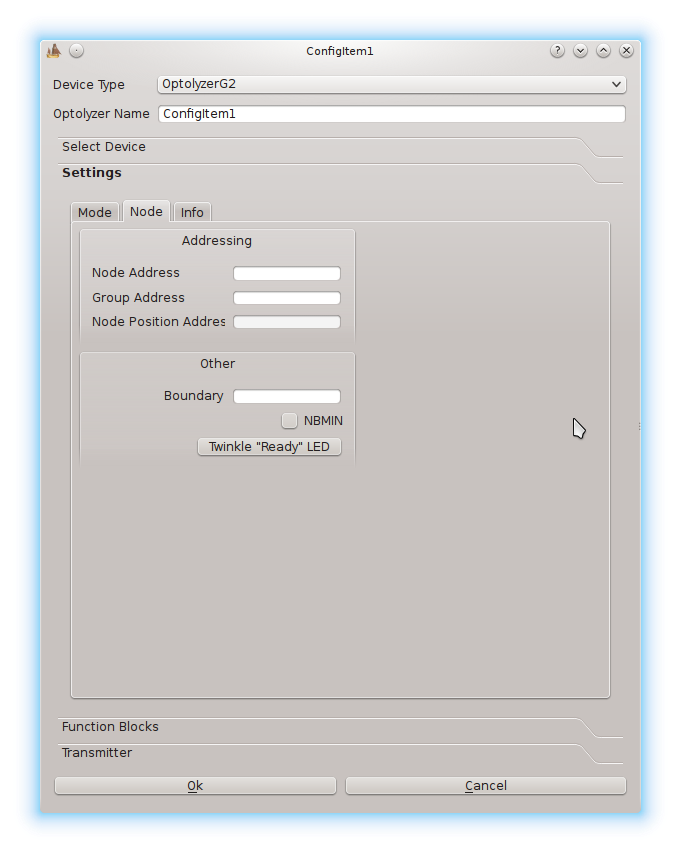
Do a left-click on the Settings-Tab and then on the "Node" Sub-Tab.
Node Address:
Here you can see and set the logical address of the NodeNIC.
Group Address:
Here you can see and set the group address of the NodeNIC.
Node Position Address:
Here you can see the node position address of the NodeNIC.
Boundary:
Here you can see the boundary (between synchronous and asynchronous data) on the MOST ring.
NBMIN:
If you check this check box, the Optolyzer will do a minimum Netblock handling by itself. If not, all Netblock messages are forwarded to a connect Script object or Most object.
Twinkle "Ready" LED:
By clicking on this push button, you will start a twinkle sequence on the "Ready" LED on the connected Optolyzer.
Function Catalogs:
Do a left-click on the Function Catalogs-Tab to configure the used function catalogs.
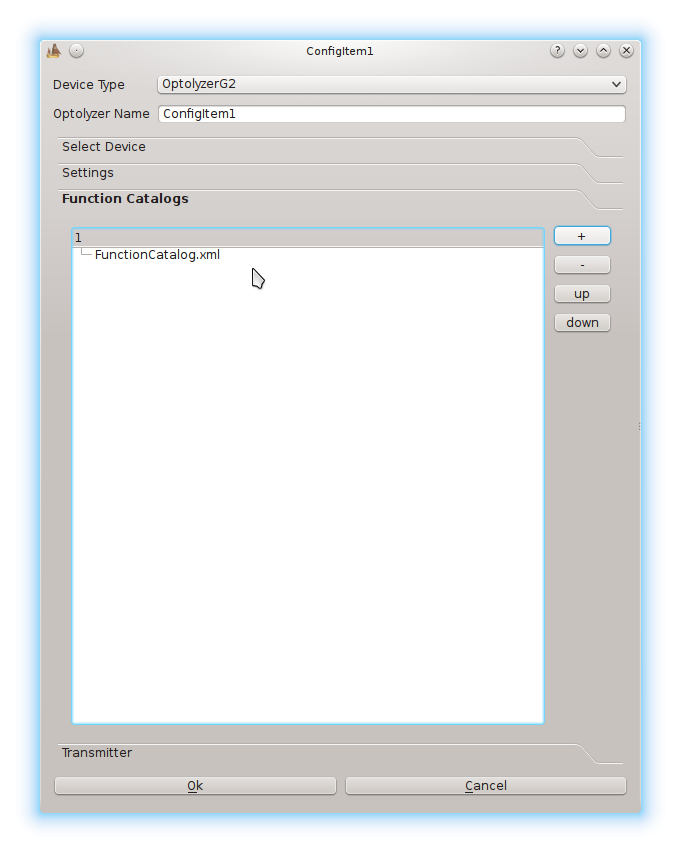
Using + button to add and the - button to remove a function catalog. You can configure multiple catalogs. The priority of the catalogs (if two catalogs defines the same functions) is as followed: The first line in the widget is the highest priority, the last line is the lowest priority.